I’ve been using a combination of scripts to do local backups on my Amazon EC2 micro instance I use to serve this website – AutoMySQL Backup and some cron jobs which ran rsync for various paths on a rotation. For example:
#!/bin/sh
rsync -a /var/www/html /mnt/backup/filebackup/weekly
rsync -a /var/lib/g2data /mnt/backup/filebackup/weekly
This is frankly a pretty lazy way to do it. I’m not protected at all if something wipes out the backup destinations or the EBS drive goes bad, and this method uses up a lot of EBS space because there are multiple sets of the files. I could use the AWS EC2 framework to script out EBS snapshots, but that’s just going to further increase my monthly Amazon bill without any ability to be very specific about point in time restores for files. Instead, I thought I should make use of something that I’m already paying for: CrashPlan.
As noted in a previous post, I’m using CrashPlan to backup our desktop & laptop computers, as well as my file server (Synology NAS). I have a CrashPlan+ Family Unlimited plan which means I can add up to 10 computers and store unlimited backups from them to the CrashPlan cloud included in the plan (local backups, or peer to peer Crashplan backups are always free and don’t require a plan).
Install CrashPlan to a Amazon Linux AMI
CrashPlan offers a number different clients, including a headless java client for Linux. This is perfectly suited to the micro instance I’m using in EC2 – the Amazon Linux AMI which is based on RedHat/Centos. I installed the headless client using the following options – note that I’m using the latest version at the time of this post (3.5.3) in my commands below, but you can see the latest download link on their page. I’m also using sudo in my commands, you can remove pr ignore that if it is isn’t needed in your Linux configuration.
sudo yum install grep sed cpio gzip coreutils
wget http://download.crashplan.com/installs/linux/install/CrashPlan/CrashPlan_3.5.3_Linux.tgz
sudo tar -xzf CrashPlan_3.5.3_Linux.tgz
cd CrashPlan-install/
sudo install.sh
At this point the installer launches and will ask questions about where the files should go. Their suggestions are reasonable for my configuration and I was able to simply follow the defaults, hitting enter the whole way through the install. Once the install finishes, it will start the CrashPlan service automatically.
Connect to the headless CrashPlan Linux server with a remote client
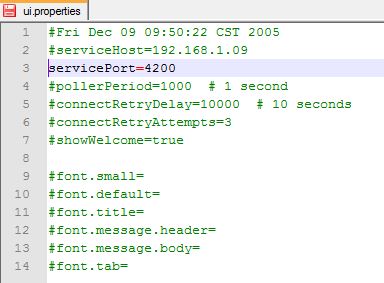
Now that the service has been started, a remote client needs to connect to the server in order to further configure backup options. The easiest and most secure way to do that is by making use of SSH’s ability to tunnel to the server. The following instructions are for Windows, but similar steps can be performed on other operating systems. First, install the CrashPlan client if it is not already installed on your computer, but don’t start the program. Next, locate and edit the ui.properties file using a text editor. This file is typically located here: C:\Program Files\CrashPlan\conf\ui.properties for Windows systems. As shown below, remove the # to uncomment the line, and change the port to 4200. When done, save the file and exit.
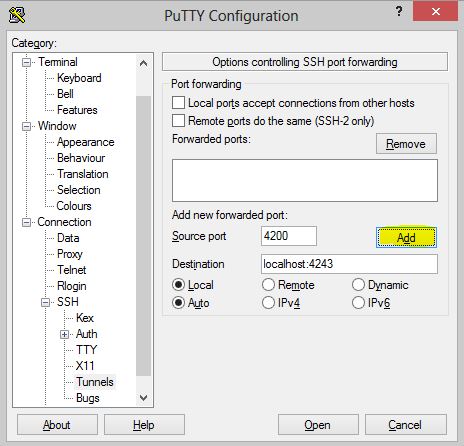
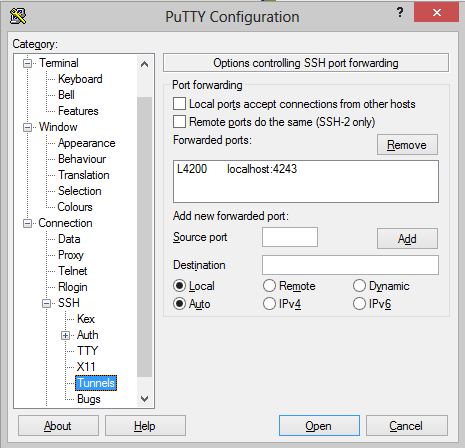
Next the SSH tunnel needs to be enabled for the client to connect to the server via SSH. Open PuTTY and create a new connection to your Linux server. Under the configuration menu, navigate to Connection, SSH, then click the Tunnels option in the menu. On that page, enter “4200” as Source port, enter “localhost:4243” as the Destination, and click the Add button. Once completed, connect to the server as normal via the configured SSH session and leave the terminal window open.
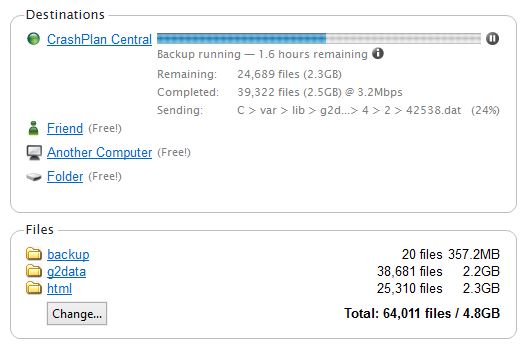
At this point the CrashPlan client can be started. It will first ask for CrashPlan credentials, then display the usual interface. Note that the compression and dedupe options can be resource heavy – which means during the first backups for the server it will likely consume a lot of CPU, particularly for EC2 micro instances which have low CPU throughput (bursting) to start with. This CPU usage should reduce over time as the backup deltas get smaller.
Configure CrashPlan Linux to backup /var or other hidden directories (if needed)
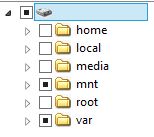
Note that by default, several directories and file structures are hidden in the CrashPlan client for Linux. In my case I want to backup files under /var, as that is where my gallery2 files reside, as well as my web content. In order to expose that folder structure for CrashPlan the my.service.xml configuration file should be edited, and the “pattern regex=”/var/” line under the Linux area should be removed. First stop the CrashPlan service and edit the config file (assuming you installed using default file paths):
sudo service crashplan stop
sudo vi /usr/local/crashplan/conf/my.service.xml
Next, look for a line like this under the Linux area and remove the following data from the file (e.g. dd in vi):
<pattern regex="/var/"></pattern>
Save the file (Esc, :wq + enter in vi) and then start the service back up. After connecting again using the client, the /var folder should now be visible.
sudo service crashplan start
This is just what I’ve been looking to accomplish, thanks for the write-up.
Exactly what I needed and worked perfectly. Thanks heaps!
When you connect headless with the local client can you still manage the crashplan service on the local machine? How is that handled in the local client